
Codex information was taken straight from the official Destiny strategy guide.
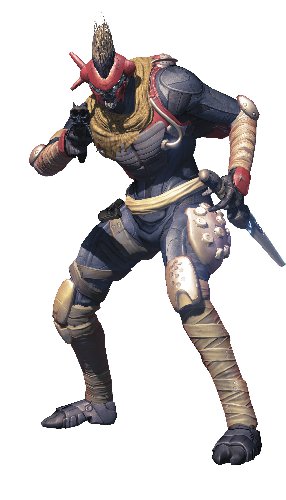
Fallen
 The Fallen are four armed aliens who are also sworn enemies of the human race. Bungie has quoted them as being “a nomadic race of once noble houses now scattered to the solar winds”. Fallen are hardy creatures who can survive in a wide range of environments without heavy armor or complex modifications to their physiology.
[toggle title=”Fallen Codex” state=”close” ]
The Fallen are ruthless scavengers. Brutal and uncaring, they arrived on their massive Ketches in the wake of the Collapse to loot and pillage the devastated worlds.
There are hints of ancient nobility to the Fallen—the scars of lost grandeur. The Kells of their scattered Houses still claim to be royalty, but they leave only grief and wreckage in their wake.
The Fallen Houses: House of Wolves, House of Winter, House of Devils, House of Kings, The Shattered House
.The Fallen are a dangerous race, fast and agile, skilled in combat and supported by robotic allies. They have stolen and raided the ruins of civilization across the solar system, and you must deal with them in order to reclaim the lost colonies.
Fallen Weapons
Most Fallen weapons deal Arc damage, with a few exceptions.
The Shrapnel Launcher and the Devil Walker tank’s cannon deal Solar damage.
The Servitor’s blast deals Void damage.
Weak Points
Humanoid Fallen all share vulnerability to headshots.
Shanks have no weak points.
Servitors have a critical point in the “eye.”
Dreg
The lowest class of Fallen, Dregs fight viciously to prove their worth to their superiors.
Loadout: Shock Pistol, Shock Dagger, and Shock Grenade
Variants: Shrapnel Launcher or Dual Shock Daggers
Behavior
Dregs are individually weak, though they retain the speed of all Fallen combatants, making them tricky targets when they are on the move.
Dregs prefer to fight from cover, which they actively seek out and use against you. They often use their own Shock Grenades to flush you out of cover while they try to pick you off with Shock Pistols.
If forced into close-range combat, Dregs retaliate with Shock Daggers. This is one of their less threatening moves, but watch out for the Dregs armed with twin daggers.
You may occasionally encounter Dregs armed with Shrapnel Launchers. These foes have no Shock Dagger, and they are usually only a threat if you get too close to them.
Tactics
You can easily dispatch Dregs with basic weapon fire, grenades, or melee attacks.
Dregs are especially useful for triggering melee-based special abilities because a melee strike can often dispatch them in a single blow. This instantly activates any melee power that triggers on kill.
However, if Dregs manage to find cover and open fire on you, be careful. Both their accuracy and their rate of fire increase while they are hunkered down. If they have a good line of sight on you from their cover, you must pick them off or flush them out.
Dreg Shock Grenades range from a nuisance on lower tiers of difficulty to a serious threat on higher tiers, particularly if the Arc Burn Skull is active. While you can easily avoid just a few grenades, dodging a hail of them while dealing with other Fallen is a serious threat.
Use your own grenades and potentially even a super on higher tiers if you can take out a cluster of Dregs in a single shot.
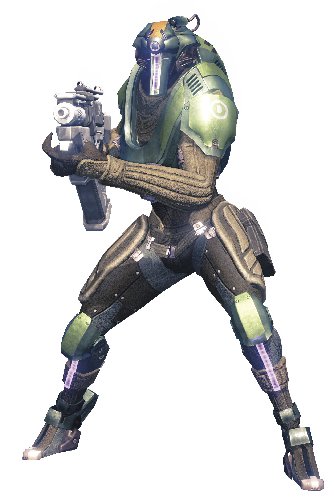
Vandal
The core of the Fallen forces, Vandals present a serious threat at any range.
Loadout: Shock Rifle or Shock Blades
Variants: Wire Rifle or Shrapnel Launcher and Shock Blades
Behavior
Vandals are dangerous combatants at medium range with their tracking Shock Rifles, or at long range with their sniper variant, the Wire Rifle.
Shock Rifle Vandals prefer to stay at a moderate distance, letting their homing projectiles do the work of flushing you out of cover or hammering you in the open.
Standing out in the open with multiple Shock Rifles targeting you is asking for a quick trip to the grave.
On the other hand, Wire Rifle snipers are typically located at long range and prefer to stay that way. You can spot them by the telltale glow of the Wire Rifle as it charges to fire at you.
Vandals can move very quickly, so be wary of losing track of them during a close-range firefight. Fireteam communication is very helpful when Vandals are around. Any party members who are at longer range and have a good overview of the battlefield can keep tabs on Vandal movement.
Tactics
Vandals are tougher and faster than Dregs, and their Shock Rifles are considerably more dangerous than Shock Pistols.
Make good use of cover when fighting them, especially if there are multiple foes present. Pursuing combat in the open or rushing them is a potentially bad idea.
Staying in hard cover and changing your position frequently is also helpful for dealing with sniper Vandals, as you can avoid their shots entirely and pick them off once you have a clean line of sight.
For all types of Vandals, you should use a precision medium- to long-range weapon to eliminate them swiftly and from a distance. Close-range or sustained fire weapons expose you to a greater volume of Shock Rifle fire or Wire Rifle shots, neither of which is good for your health.
Single target or area denial grenades work better than most seeking varieties because Vandals are usually strong enough to survive a seeker grenade hit. On the other hand, sticky grenades are frequently lethal, and area denial grenades can push them out of cover (or kill them outright if they refuse to move).
Be careful when trying to use grenades or slower offensive supers against Vandals. These enemies are fast enough to evade incoming attacks if they are fully aware of your position and spot the incoming grenade or super.
Stealth Vandal
Equipped with cloaking technology, Stealth Vandals are a dangerous invisible threat.
Loadout: Shock Rifle or Shock Blades
Variants: Wire Rifle or Shrapnel Launcher or Shock Blades
Behavior
While Stealth Vandals are technically a simple variant of the basic Vandals, their inherent cloaks make them considerably more lethal.
Stealth Vandals can be armed with Shrapnel Launchers, Shock Rifles, Wire Rifles, or Shock Blades.
Melee Stealth Vandals use their cloaks to get in close and attack you for massive damage at point-blank range. In hectic battles or poor lighting conditions, it can be very difficult to spot sniper Stealth Vandals before they fire.
Unalarmed Stealth Vandals won’t trigger their cloaking devices until they are aware of you. In some encounters, you can pick them off at long range before they become active and alert.
Tactics
Firing at a Stealth Vandal disrupts its cloak while it is taking damage, and they do decloak completely when they perform a melee attack.
Using your movement abilities to escape from melee Stealth Vandals is highly recommended if they manage to close the distance with you.
Sniper Vandals aren’t any more dangerous than normal Vandals once you are aware of their position. The trick is finding them in the first place before they take your head off.
Stealth Vandals do sometimes move more slowly than normal Vandals to maximize the concealing properties of their cloaks, but they still advance very quickly into melee range when using their Shock Blades.
Unlike normal Vandals, consider bringing some form of close-range weaponry if you know there is an abundance of melee Stealth Vandals in your chosen mission.
You can often evade Stealth Vandals by jumping, but not every combat situation is suitable for exposing yourself in the air repeatedly while trying to maintain your distance.
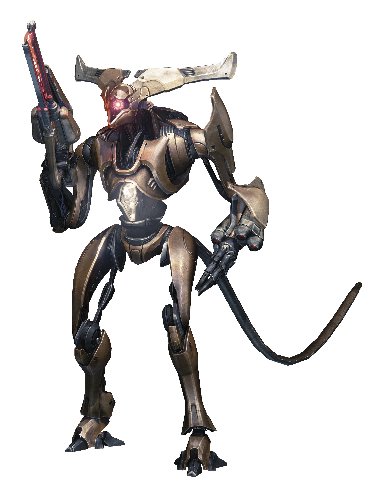
Captain
The elite of Fallen society, Captains are tougher and more dangerous than their lesser brethren.
Loadout: Shrapnel Launcher, Shock Blades, or Arc shield
Variants: Shock Rifle or Shock Blades
Behavior
Captains are the most dangerous of the Fallen minions. They are protected by Arc shields and equipped with teleporter tech that lets them rapidly relocate or evade incoming attacks.
Captains also have superior accuracy with their weapons and are tougher than other Fallen.
Captains exhibit a range of behaviors depending on their weapon type. Shrapnel Launcher Captains usually push toward you more aggressively, whereas Shock Rifle Captains keep their distance. Captains weilding dual Shock Blades are dangerous due to thier shields.
The Captains’ teleport ability makes them particularly dangerous when they approach you and aggravating when they retreat to restore their Arc shields.
There is no direct counter to the teleport; you simply must be aware that they can do it. Expect Captains to blink away from grenades (or you!) if they want distance, or teleport toward you if they want to get into Shrapnel Launcher or melee range.
Tactics
Shock Rifle Captains are dangerous and present a significant threat as long as they are active in the battle. Respect their presence and keep tabs on their location, ideally remaining behind hard cover if you aren’t actively engaging them.
Depending on the specific encounter, you can sometimes ignore Captains armed with the Shrapnel Launcher if you can keep your distance.
Captains attempt to exploit their Arc shield protection fully, and they will use their teleport and agility to get out of line of sight and recover their shield if it drops.
If you attack a Captain, expect that it will retreat when its shield drops. You can use this to force a disengagement, but it won’t buy you much time, and it can be draining on your ammo reserves or available ability energy.
It is typically better to focus fire on a Captain once it presents a credible threat and eliminate it before it can regenerate. Just don’t expose yourself to other Fallen while you recklessly pursue a fleeing Captain.
If you are playing any high-difficulty mission with a heavy Fallen presence, bring a reliable source of Arc damage to cut down Captains quickly.
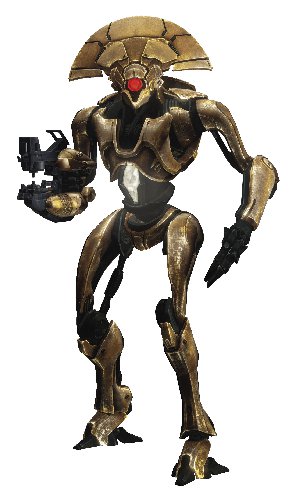
Shank
As hovering robotic assault drones, Shanks provide fire support to Fallen combat teams.
Loadout: Shock Pistol
Variants: Shock Rifle
Mythic Difficulty: Gain Solar shield
Behavior
Shanks float across the battlefield at a moderate speed and open fire whenever they can get a clear shot. Shanks have less of a self-preservation instinct than the humanoid Fallen, and as a result, they can be dangerously aggressive.
Because Shanks hover and push toward your position, they can often flank you by surprise, or simply nullify your cover by floating around or over it. Individually, Shanks aren’t much more dangerous than Dregs, but their impact on the flow of battle can be significant because of this behavior.
Some Shanks are armed with Shock Rifle-equivalent guns, which are noticeably more dangerous than the basic Shock Pistol model. Because you can’t tell them apart at a glance, you often find out the hard way when they open fire on you with tracking projectiles.
On Mythic difficulty, Shanks become equipped with Solar shields, and this moves them from pests to serious threats. You can no longer safely ignore them until the last minute because they won’t simply explode when you use your primary weapon against them, unless you have a powerful source of Solar damage prepped.
Tactics
When dealing with Shanks, you should eliminate them the instant you spot them joining the fight. They are fairly weak and easy to destroy, and because they hover and float around the battlefield rather than actively using cover, they are often exposed and make for simple target practice.
If you do not destroy them quickly, you risk being flanked when they move on your position. Being pushed out of cover by Shanks while other Fallen are firing on you is a bad situation to be in—avoid it in the first place!
Shanks with Solar shields are another matter. If you’re going into a Mythic mission with significant Fallen presence, bring a ready source of Solar damage. You must still destroy Shanks quickly when they join the fight, and the only way to do that reliably is shredding their shields.
Shanks do not have a weak point that you can strike for precision damage, so don’t worry about accurate fire—just land hits on them.
Servitor
Servitors are floating robotic support units that protect and heal nearby Fallen.
Loadout: Eye Blast
Variants: None
Behavior
As hovering support units, Servitors are larger and more dangerous than Shanks, but considerably less common. Servitors possess the ability to heal humanoid Fallen units and can also employ a short-range teleport.
Servitors tend to hover behind other Fallen units, letting the heavy hitters engage you while they bombard you from a distance and heal any damaged and retreating Fallen.
Servitors use their teleport to disengage or avoid attacks much like Captains do. However, their normal floating movement speed and agility are both much lower than that of a Captain.
Tactics
A halo of Void energy surrounds Servitors, and they continuously heal any nearby Fallen. This ability, combined with their powerful explosive attack, makes them a priority target on the battlefield.
Servitors are easy targets because of their considerable size, relatively slow movement speed, and large “eye” as a weak point.
However, they are also sturdy units, so while they are easy to hit, exposing yourself long enough to destroy one is often inadvisable if there are many Fallen nearby.
Servitors make excellent targets for rocket launchers and offensive super moves. They are easy to hit, and eliminating them (and any Fallen nearby) can improve your odds against any remaining Fallen forces.
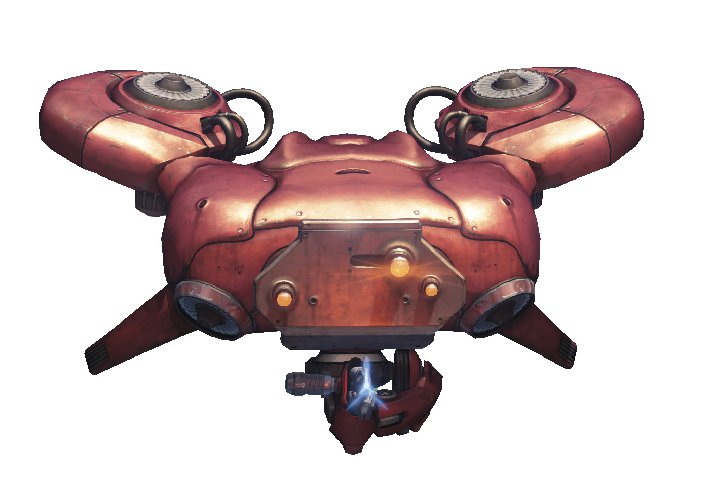
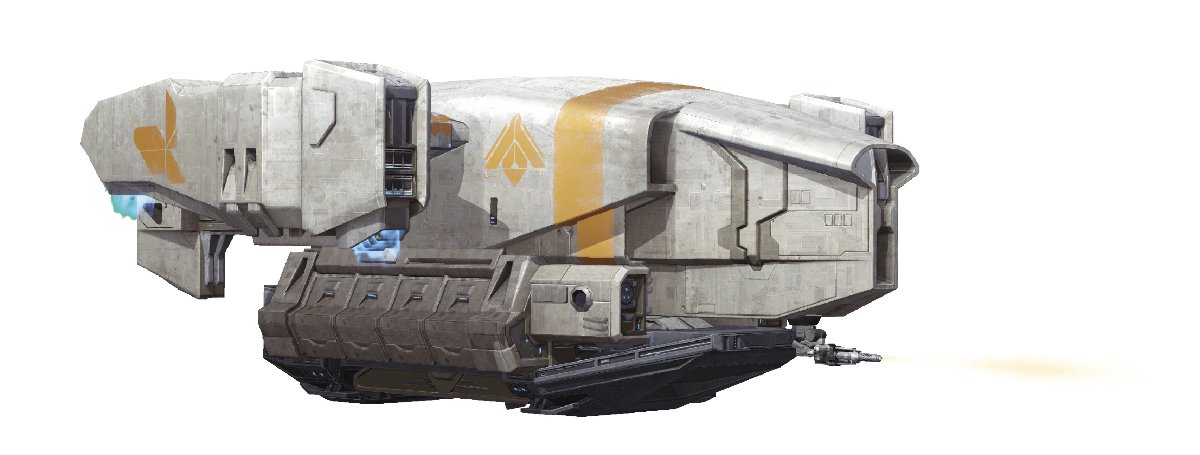
Skiff
A rapidly moving cloaked transport, a fleet of Skiffs dispatched from the Fallen’s massive Ketch warships can quickly deploy strike teams to the battlefield.
Loadout: Skiff Turrets
Variants: None
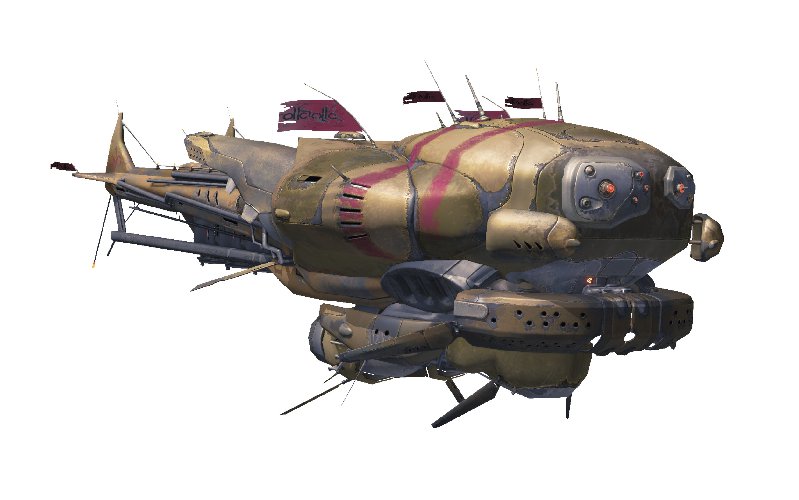
Behavior
You typically only encounter dropships in open exterior areas, where they arrive, decloak, drop packs of Fallen, and then depart.
While Skiffs are flying in, deploying, and departing, they can bombard you with fire from their turrets. The turret fire is not devastatingly powerful, but it can make safe cover very unsafe because of the high altitude and angle from which the Skiff can attack you. Find a ceiling to hide beneath, or keep moving!
However, during some encounters or Public Events, a Skiff may hover overhead for a longer period of time. If this occurs, the Skiff’s turrets continuously attack any Guardians in the area.
Tactics
You can destroy the turrets with sufficient firepower. With Skiffs that are simply dropping troops and departing, it’s rarely worth spending the time on them; you’re better served targeting the Fallen as they deploy.
On the other hand, if a Skiff remains on the battlefield, destroy its turrets to remove the Fallen air support.
[/toggle]
[toggle title=”Fallen Enemy Trailer” state=”close” ][yframe url=’http://www.youtube.com/watch?v=7TGWUsBM5S4′][/toggle]
[divider]
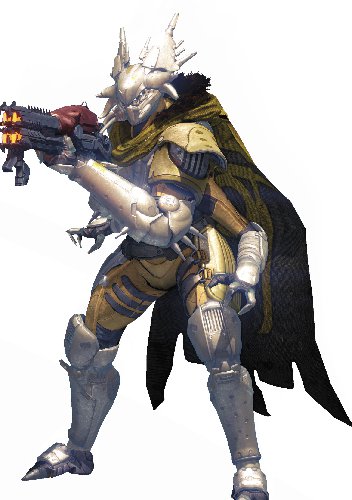
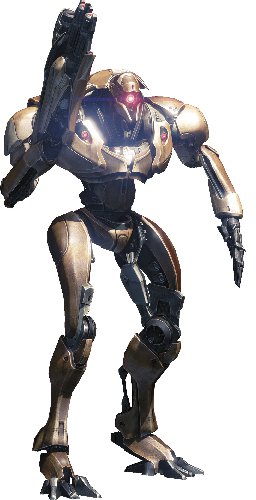
Vex
 The Vex are a species of time-traveling robots vetted against humans. Vex are mass-produced machine units, constructed of an unknown metal alloy resembling hammered brass.
[toggle title=”Vex Codex” state=”close” ]
The Vex are architects of ancient and complex structures on Venus and Mercury. Linked by a data network unlike any on Earth, they operate in unison, directed by a single unfathomable purpose.
Vex Programming: Hezen Corrective, Hezen Prime, Vega Prohibition, Aphix Invasive, Sol Divisive.
Bodies of animate metal with traces of living matter within, the Vex are an enigma, traveling through time and space with their gateways.
It is not clear if they have arrived here from the future, the past, or from another past or future. What is clear is that they represent a dire threat to humanity.
They march with a singular purpose on the battlefield, driven by some unknown and unknowable intelligence, passionless and focused on completing their mysterious objectives.
The Vex transform the planets they occupy, terraforming inorganic landscape into massive computational structures. Their grand designs have no room for the Guardians’ presence, and they must be stopped.
Vex Weapons
The Vex’s Slap Rifle and Line Rifle, as well as the Hydra’s dying explosion, all deal Solar damage.
The Torch Hammer, Slap Grenade, and Goblin and Hobgoblin melee strikes all deal Void damage.
Finally, the Minotaur’s melee strikes deal pure Kinetic damage.
Weak Points
Unlike the other humanoid races, the “humanoid” Vex (the Goblin and the Hobgoblin) have weak points that are located in the center of their torsos.
Harpies and Hydra both have weak points in their “eyes.”
Minotaurs have no weak points.
You can shoot the heads off Goblins, Hobgoblins, and Minotaurs, but beware: this causes them to enter a berserk state where they fire faster (albeit with less accuracy) and charge your position.
Teleportation
The Vex possess sophisticated gateway technology, and this extends to their combat units, many of which are armed with personal teleportation tech.
Goblins, Hobgoblins, and Minotaurs all possess the ability to “blinkwalk,” teleporting as a group from place to place. You can often observe this behavior if you engage a group of them at long range—they’ll blink rapidly toward your position.
At shorter ranges, Goblins and Minotaurs both continue employing their teleportation ability, but Minotaurs are notably more aggressive (and dangerous) than Goblins with their usage of teleports.
Goblin
The numberless frontline troops of the Vex, Goblins are plodding, methodical combatants.
Loadout: Slap Rifle
Variants: Torch Hammer
Behavior
Goblins are slow-moving automatons. Armed with the Vex Slap Rifle, they march steadily across the battlefield, firing as they move.
Goblins display less of a self-preservation instinct than other races, but they still move evasively and take cover from your attacks. Goblins will also crouch to protect thier juiceboxes (and do so more frequently on higher tiers). Destroying thier head will force them to stand up and expose thier juicebox again… but now they charge.
Goblins can move more quickly at long ranges via their Blinkwalking, and at close ranges, you may occasionally see them execute a short-range teleport to move to cover.
While individual Slap Rifle Goblins do not present a serious threat, the more rarely encountered Torch Hammer Goblins do.
Goblins equipped with the Vex’s explosive weapon are considerably more dangerous; make them a priority target.
Tactics
Goblins move fairly slowly and are easy to dispatch with Primary Weapon fire. Just be sure to target their stomachs, not their heads!
If you stick to cover when numerous Goblins are present, you can swiftly and safely take them down. Avoid underestimating large groups of Goblins, especially on higher difficulty missions. With enough of them present, Goblins can lay down a serious wall of firepower.
If you spot enough Goblins clumped together, they make great targets for grenades and area-of-effect super abilities. Supers are particularly notable because Goblins are usually too slow to evade the attack. If you wipe out an entire wave of Goblins in one shot, you can generate quite a few Orbs of Light for your Fireteam.
Hobgoblin
Long-range sharpshooters, Hobgoblins fulfill a suppressive role in combat, supporting Vex forces from a distance.
Loadout: Line Rifle
Variants: Slap Rifle
Behavior
Hobgoblins typically take up positions at long range, using their sniper-class Line Rifles to inflict heavy damage to exposed Guardians.
When they take any incoming fire, Hobgoblins instantly erect an impenetrable shield, sealing themselves in stasis and becoming completely immune to incoming damage for a short time.
Like other sniper weapons, the Line Rifle has a distinctive gleam as it charges to fire. If you spot it, get to cover quickly. You may get a single ranging shot if you’re lucky, but stay in the open, and you are certain to be hit.
Less commonly, you may encounter Hobgoblins armed with the Slap Rifle. Hobgoblins are more accurate and dangerous with this weapon than Goblins, but you can afford to break from cover once you confirm there are no Line Rifles aimed in your direction.
All Hobgoblins use Slap Grenades, Void charges that can flush you out of cover. However, you are unlikely to see these used if you keep your distance. Be aware of their potential danger if you close the gap!
Tactics
To dispatch Hobgoblins, bait out their shields with a light hit, then follow up with a fatal barrage when they drop out of stasis.
Taking off a Hobgoblin’s head removes the ability for the Hobgoblin to use its Stasis Shield.
It is also possible to instantly dispatch a Hobgoblin if you strike with enough force in a single shot. Rockets, close-range Special Weapons, or super moves can all get the job done.
Because you typically encounter Hobgoblins at long range, your own sniper rifle or precision Primary Weapons work well for eliminating them safely.
Take down Line Rifle Hobgoblins before you focus on Goblins, as their suppressive fire can keep you pinned in place. This is bad news if there are other Vex around.
Harpy
The floating Harpy is a scout and mobile weapons platform, deploying in mid-air to annihilate its targets.
Loadout: Twin Slap Rifles
Variants: None
Mythic Difficulty: Gain Arc shield
Behavior
Harpies are hovering Vex drones that use their aerial maneuverability to bypass cover and attack you. Harpies must stabilize their position in mid-air to use their twin Slap Rifles.
This behavior is easily spotted, as a Harpy’s gleaming central eye is quite visible when it stops and spreads its “body.” While deployed, their eyes also make for an easy target. The optimum time to quickly take them down is just as they deploy but before they open fire.
A flock of deployed Harpies can also lay down a withering hail of Solar energy from their Slap Rifles, so don’t ignore them if they are present in large numbers.
On Mythic difficulty, Harpies gain an Arc shield, which pushes them from dangerous nuisance to just plain dangerous. Bring a ready source of Arc damage to knock them out of the sky quickly.
Harpies do not make use of Blinkwalking.
Tactics
Harpies are not particularly sturdy, so you can take them down with Primary Weapon fire fairly easily. Unfortunately, they serve as a dangerous distraction when more serious Vex threats are present.
This does not apply on Mythic difficulty once they gain their Arc shields—be sure to bring an Arc Special Weapon or machinegun to dispatch them swiftly.
Harpies are most vulnerable immediately as they deploy. When stationary in mid-air with their eyes aimed directly at you, they make for an easy shot.
However, they are also easy enough targets to destroy even when not aimed right at you (or at another Guardian). If you see an opportunity to dispatch them while they move around the battlefield, do so.
Hydra
This hovering data fortress is armed with heavy firepower and an impregnable computational shield.
Loadout: Twin Torch Hammers
Variants: None

Behavior
The Hydra is a massive floating Vex unit, armed with a pair of lethal Torch Hammers and protected by a floating barrier of logic that blocks all incoming attacks.
Left unchecked, it continuously bombards your position. Lethal in the open and dangerous even if you are in cover, the Hydra has enough firepower to force you to move from any position that it can reach with the blast of its Torch Hammers.
Finally, when the Hydra is destroyed, its core erupts in an explosion, damaging anything nearby—though you should rarely be in a position where you are at point-blank range when it detonates!
Like Harpies, Hydras do not use Blinkwalking for mobility.
Tactics
Thankfully, both the Hydra and the shield that protects it are slow to move. Plus, the shield only covers a frontal arc (constantly rotating to your right)—it can be flanked or fired over or under depending on the terrain.
The Hydra is extremely dangerous, so make it a priority target for Heavy Weapons and super moves. Hitting this shield with a rocket wastes a rocket.
A sniper rifle or precision Primary Weapons can also be a boon depending on the terrain. It is possible to shoot over the shield, and if you can get into a flanking position, you may be able to hit the Hydra’s weak point in its “eye.”
Minotaur
A towering machine of war armored with raw Void energy, the Minotaur is a heavy Vex assault unit.
Loadout: Torch Hammer, Void shield
Variants: Slap Rifle
Behavior
Minotaurs are dangerous and durable Vex units. They serve as anchors for larger groups of Vex, either bombarding you from a distance with their Torch Hammers or using rapid teleports to close into melee range and smash you at point blank.
Minotaurs are much more aggressive about using their teleport ability than Goblins. They are also particularly adept at dodging incoming rockets, supers, or grenades by teleporting past them.
Often, attempting to land such an attack causes the Minotaur to teleport several times in quick succession, ending with a Minotaur at close range and its armored fist aimed at your face.
Minotaurs are protected by Void Shields, so bring a ready source of Void damage to destroy them. On top of that, they do not have a weak point. Combined with their inherent durability, this makes them a very sturdy enemy.
Destroying a Minotaur’s head has two key effects: it disables their ability to regenerate their Void Shield, and it causes them to go berserk, spraying shots more rapidly but less accurately as they move toward you.
The Minotaur’s normal weapon is the explosive Torch Hammer, and its directed blasts can force you out of light cover and cripple you in the open. Use short jumps and movement ability to evade the worst of the blast damage.
Minotaurs may appear on the battlefield armed with Slap Rifles. If so, be wary, as they are markedly more accurate and dangerous with them than Goblins are.
Tactics
Whenever possible, strip a Minotaur’s shield at range and quickly destroy its head to prevent it from regenerating. While rampaging Minotaurs are dangerous, their undirected fire and erratic behavior are often less threatening than their well-aimed suppressive fire and quick teleports.
Be very careful if you get to close-medium distance with a Minotaur. This is exactly the range that they can cover extremely rapidly with a few teleports. While Minotaurs normally seem like fairly slow and plodding units, you won’t think that when they blink toward you and rush into melee in seconds.
It is well worth using the big guns on Minotaurs. However, because they are adept at evading slow-moving high-power attacks, a machinegun is recommended over a rocket launcher.
If you do plan to use rockets, try to bait a teleport with a grenade first, or fire at them from long range before they are fully aware of your presence.
[/toggle]
[toggle title=”Vex Enemy Trailer” state=”close” ][yframe url=’http://www.youtube.com/watch?v=S4MxB_cQAGE’][/toggle]
[divider]
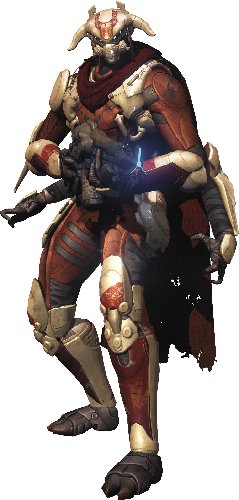
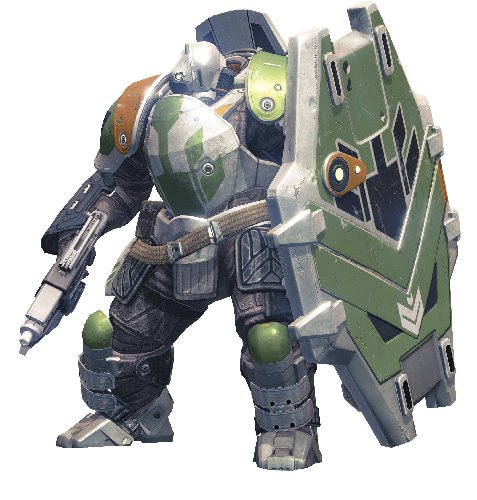
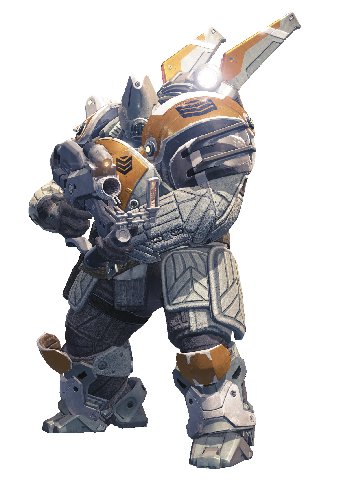
Cabal
 Cabal’s are a Juggernaut of a species, outfitted with thick armor and powerful weapons. Enemies of the human race, they inhabit the Exclusion Zone on Mars. They are a professional military operation.
[toggle title=”Cabal Codex” state=”close” ]
Brutally efficient and unrelenting, the Cabal are the greatest known military force in the system.
Their origin is as much a mystery as their end game, but it is said they have conquered more planets than the Guardians have charted, and they are preparing for annihilation.
While they are massive in size and well-protected by heavy armor, they can be made to bleed.
Cabal Detachments: Sand Eaters, Dust Giants, Siege Dancers, Bone Crushers, Sky Burners, Ice Reapers.
The Fallen are a broken race of scavengers, the Vex are unfathomable, and the Hive are pure darkness.
The Cabal are none of these things. They are a sophisticated military culture, armed, armored, and organized for conquest.
Though they are physically imposing, do not mistake them for unintelligent or slow giants. They are a calculating and dangerous fighting force.
It is fortunate for humanity that they are mired in a conflict with the Vex on Mars, for they view the solar system as simply one more in a long line of victories, one that you must stand against.
The Cabal respect nothing but pure strength on the battlefield. Show them yours.
Cabal Weapons
Cabal deal pure Solar damage with a single exception: the Psion’s psi blast attack inflicts Arc damage.
Weak Points
All Cabal units are weak to precision headshots.
Legionary
As frontline opponents, Legionaries rocket into battle with their jump packs.Loadout: Slug Rifle
Variants: Projection RifleBehavior

Legionaries are the most commonly encountered Cabal troop type. Equipped with the Cabal’s standard-issue Slug Rifle, Legionaries tend to stick to a medium distance, hammering you with fire from range.
Legionaries do make use of cover, but because they are so physically large, they are often easier to target (particularly with headshots) unless the available cover is large enough to fit their increased bulk.
While Legionaries move fairly slowly, they are equipped with jump packs that allow them to cover long distances very quickly.
They often use these jumps to escape an unfavorable situation or (more threateningly) to jump over your cover and flank you.
Be wary of Legionaries armed with the Projection Rifle. This rapid-fire explosive weapon makes any Legionary wielding it a serious threat that you should deal with swiftly.
Tactics
Legionaries are easy targets, so aim for headshots as often as possible to dispatch them swiftly.
Be wary of their jump jet movement. As long as you maintain sufficient distance from a group of them, they cannot easily flank you, but if you are fighting in an open environment, they can and will use their jump packs to bypass your cover and surround you.
Avoid getting pinned into a firefight with other Cabal units while jump jet-capable troops are present. If you stay in place while Legionaries leapfrog to your flanks or rear, you can quickly find yourself in a losing battle.
One quirk compared to the other races’ basic units: because of their larger size and tendency to use their jump jets, it is somewhat more difficult to land a devastating grenade, rocket, or super move on a cluster of Legionaries. They are rarely clumped together in large groups, unlike the lesser minions of other races.
Phalanx
Marching into battle with an indestructible shield, Phalanx units form a slow-moving wall of Cabal force.
Loadout: Slug Rifle
Variants: None
Behavior
Phalanx units are basic Legionaries trained in the use of a heavy combat shield. This shield gives them full frontal protection while deployed, and it cannot be destroyed with conventional weapon fire.
If you shoot a Phalanx and miss, or hit its shield, it raises its shield and defends while blindfiring over it in your general direction. While blindfiring, Phalanx units are less accurate, but shoot more quickly.
Phalanx units do trade out their jump jets to make use of their shields, so they are a less mobile threat than Legionaries or Centurions.
Tactics
You can damage Phalanx units from the front. If you aim carefully at an exposed limb blindfiring at you, or move to flank them even slightly, you can often hit their sides.
Working with your Fireteam makes Phalanx units much easier targets. Have one player draw their attention, then flank and finish them off with rapid headshots.
You can also damage them from the side with explosives, or simply use a super and smash through their defenses.
Centurion
As trained leaders, Centurions make up the upper ranks of Cabal forces in the field.
Loadout: Projection Rifle, Solar shield
Variants: Slug Rifle
Behavior
Armed with the lethal Projection Rifle, protected by a Solar shield, and equipped with jump jets, Centurions are a serious threat.
Centurions are tougher, more dangerous Legionaries. Their shields make them a tougher nut to crack, and when combined with jump jets, they are aggravatingly durable at long range, where they can continuously jump behind cover.
Besides their shields, Centurions are most often armed with a Projection Rifle, and the continuous bombardment of explosive Solar energy from a Centurion is a serious threat.
Be aware that Centurions can also come equipped with a Slug Rifle. When armed in this manner, they are faster and more accurate than their Legionary underlings.
Tactics
While the general behavior of Centurions is similar to Legionnaries, their improved durability and increased weapon lethality make them considerably more dangerous.
Bring Solar-powered weaponry or spammable abilities to knock down their shields. If you give them any time to recover, they will quickly use their jump jets to get behind cover, regenerate their shields, and resume pounding you from a distance.
If you can keep your distance, picking off the ready headshot-friendly targets in the area and leaving Centurions for last is possible. However, in combat situations where you cannot disengage, you must eliminate them quickly. Don’t hesitate to burn a super or Heavy Weapon shots on Centurions if the opportunity presents itself.
Colossus
Massive even among the giant Cabal, the Colossus provides devastating heavy fire support on the battlefield.
Loadout: Heavy Slug Thrower
Variants: None

Behavior
The Colossus is a seriously dangerous enemy. Armed with a heavy rapid-fire weapon, the Colossus can tear an unprepared Guardian apart in seconds if you get caught in the open.
Besides their primary weapon, Colossi can also launch seeking rockets at distant targets in cover, forcing you to relocate or get hammered by the explosive barrage.
Finally, if you find yourself at close range with a Colossus for some reason (not a great place to be!), they have a 360-degree ground slam that can deal heavy damage.
Tactics
Despite their strengths and their danger, they do have one major weakness: mobility.
Colossi are slow and lumbering, even for Cabal troops. If you can manage to stay at long range and hammer their heads with pinpoint shots, you can take them down before they have a chance to make their presence felt.
However, in any situation where other Cabal forces are engaging you and a Colossus is allowed to roam freely, you must constantly be aware of its location.
Even if the Colossus doesn’t have a direct line of sight for its Heavy Slug Thrower, it can still bombard you with rockets from a distance. If you have poor cover, these can easily force you to relocate.
Using your supers and Heavy Weapons on a Colossus the moment it shows up is a very good idea. On higher difficulty levels, get your entire Fireteam to focus fire and down these adversaries as quickly as possible.
Psion
The Psion is a lithe and wiry counterpart to other lumbering Cabal troops, providing fast-moving fire support in combat.
Loadout: Slug Rifle, Psionic Blast
Variants: None
Mythic Difficulty: Void shield
Behavior
Psions are rapidly moving, sneaky combatants, preferring to remain at a distance and hide behind cover, where they fire with greater accuracy and speed once bunkered down.
This alone would only make them a minor threat, but they also have the power to launch a massive wave of psychokinetic Arc energy toward you. This wave deals heavy damage, and getting blasted by it is very easy if you ignore a Psion while you are occupied with other Cabal forces.
Psions are nimble fighters, and they provide a marked contrast to the giant and easily hit Cabal forces. You must pay a bit more attention to spot and pick off Psions with headshots at range.
On Mythic difficulty, Psions gain a Void shield. This seriously increases their threat level, since now they are durable and have their psi blast to inflict serious damage. Bring a good source of Void damage to deal with them, as letting the nimble Psions retreat repeatedly to recover their shields can make them a nightmare to fight.
Tactics
Psions are more difficult to spot and hit than the other Cabal, but they make very distinctive sounds. Keep your ears open to avoid getting smashed by an unexpected psi blast.
Because of their psionic shockwave, Psions are a dangerous target to melee. You can get in close and pummel them, but if there are multiple Psions present, it isn’t uncommon to engage one at point-blank range and have a second nearby Psion blast you.
You can, however, evade the psionic blast. It shoots across the ground, crawling over low cover, but if you jump in time, you can avoid the damage entirely.
Harvester
The sturdy Harvester dropship is a combat-ready transport, capable of transporting Cabal forces into hot zones with surprising speed and agility.
Loadout: Solar Turrets
Variants: None
Behavior
Anywhere on the surface of Mars, you can expect to encounter these Cabal troop transports. Arriving with a barrage of Solar fire from their turrets, they quickly deploy combat-ready Cabal forces onto the battlefield.
Harvesters typically only bombard you with turret fire while they are deploying troops, but they may remain on the battlefield during certain encounters, continuing to pound your Fireteam with supporting fire.
Tactics
It’s possible to destroy the Harvester’s turrets. If a Harvester has deployed its troops and remains on the battlefield, you must eliminate its firepower to engage the Cabal safely.
Because the Cabal are packed together and vulnerable for a moment as they deploy, this is an ideal time to hit them with an explosive weapon or super move. Just don’t expose yourself to too much turret fire, and be aware that an overly aggressive play can leave you in a very bad situation if you don’t eliminate all of the deployed forces.
[/toggle]
[toggle title=”Cabal Enemy Trailer” state=”close” ][yframe url=’http://www.youtube.com/watch?v=YwJbyNnRAAU’][/toggle]
[divider]
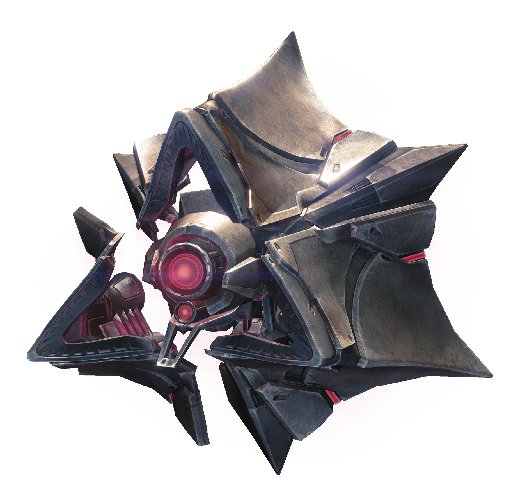
Hive
 The Hive have been referred to as “space zombies”, this leads us to believe they can infect other species. The Hive have carved a kingdom deep into the lifeless core of the Moon, and it is there they remain, silent and buried among many dark and terrible secrets.
[toggle title=”Hive Codex” state=”close” ]
The Hive are an ancient, festering evil. Their antipathy to the Light transcends hatred. To the Hive, the eternal struggle between light and dark is not only a war, it is a crusade—all Light must be devoured so Darkness can reclaim the universe.
Hive Sects: Blood of Oryx, The Scarlet Brood, Spawn of Crota, The Hidden Swarm, Venom of Oryx.
Conflict is not always cleanly black and white; there are complexities, shades, and arguments for either side.
But there are no arguments for the Hive. They are pure evil, and they seek to destroy humanity.
A foul blight on the faded grandeur of the solar system, the Hive must be destroyed.
Hive Weapons
Hive weapons deal a variety of damage types.
The Shredder, Ogre’s Eye Blast,Tomb Ship’s turrets, and the Shrieker’s attacks all deal Void damage.
The Boomer, Thrall’s claws, Cursed Thrall’s detonation, and Wizard’s energy bolts all cause Arc damage.
Finally, the Wizard’s poisonous cloud of darkness, the Knight’s Cleaver, and the Ogre’s ground smash all inflict pure Kinetic damage.Weak Points
For all Fallen, their heads are their weak point.
For Ogres, the weak point is still their heads, though it’s more precisely their “eyes.”
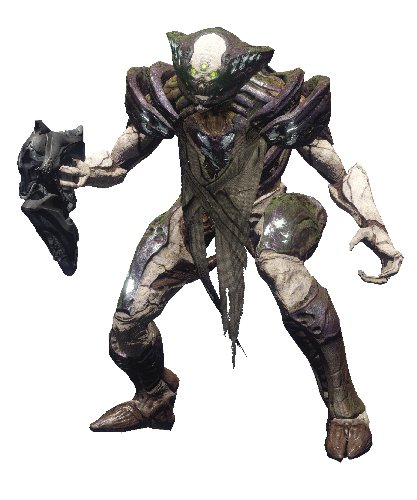
Thrall
Degenerate avatars of rage, Thrall rush blindly into combat to rend and tear with their claws.
Loadout: Claws
Variants: None
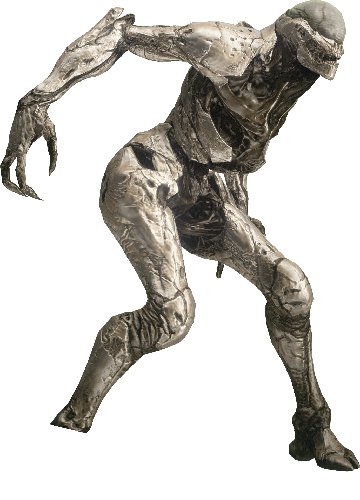
Behavior
Thrall are nearly mindless berserker units, charging headlong into melee combat range.
Thrall typically come in large packs, and when they arrive, they quickly swarm the nearest target they can find and attempt to tear it apart.
Tactics
Thrall lack any subtlety whatsoever, which you can exploit in several ways. For example, simply using your movement abilities to float over their heads renders their melee attacks completely ineffective.
However, avoid exposing yourself to other hostile Hive units in the area while doing so, as Thrall can easily force you out of cover.
Because Thrall are melee only, a strong shotgun is highly advisable if you expect to be forced into close-range engagements in tight spaces with packs of Thrall.
Rapid-fire weaponry and persistent area-of-effect grenades can also serve you well against packs of Thrall.
Cursed Thrall
These corrupted Thrall are capable of detonating explosively at short ranges.Loadout: Detonation
Variants: None
Behavior
As explosive variants of normal Thrall, Cursed Thrall move more slowly. However, when they get into melee range, they explode, dealing damage in a blast of foul energies.
Cursed Thrall will detonate when you destroy them, so be careful about killing them near your teammates! A Cursed Thrall will also harm combatants, so a well placed Cursed Thrall death can take out an entire pack of Thrall.
Cursed Thrall are often interspersed with packs of regular Thrall, and they are a serious threat that you must deal with swiftly. While regular Thrall flush you out of cover, Cursed Thrall detonating nearby while you are taking fire can be fatal, especially on higher difficulty missions.
Tactics
When you spot them on the battlefield, you should make Cursed Thrall priority targets. They are too dangerous to be allowed into melee range, but their detonation can be used as a weapon against other nearby Hive.
Cursed Thrall are a bit slower than normal Thrall, but they tend to be mixed into waves of Thrall. When other Hive are present and bombarding your position, picking them off can be difficult.
Unlike with regular Thrall, avoid using short-range weapons or melee strikes against Cursed Thrall. Simply pick them off from a distance before they can become a threat.
Acolyte
Foul enforcers of the Hive’s black army, Acolytes engage at a distance behind a wall of howling Thrall.
Loadout: Shredder
Variants: Boomer
Behavior
Acolytes are the most common frontline combatants of the Hive forces. More cunning than the ravening Thrall, they behave more closely to the Fallen Dregs, lurking at a distance and taking shots with their Shredders.
Acolytes typically seek out nearby cover and open fire from a distance. Be wary of entrenched Acolytes: just like Dregs, their accuracy and rate of fire increase when they have taken cover.
More infrequently, you may encounter Acolytes armed with Boomers, the Hive’s dangerous explosive weapon. These Acolytes are no more sturdy than their Shredder brethren, but they are considerably more dangerous—make them high-priority targets.
Tactics
Acolytes are fairly weak targets. Use primary weapons, grenades, or melee strikes to take them down quickly.
They are primarily a danger when larger numbers of them engage you in an encounter alongside masses of Thrall and other heavier-hitting Hive forces.
Aim for the head and pick them off quickly. You can often quickly eliminate the Acolytes in a battle before turning your attention to any remaining Hive.
If you’re forced to shift your attention to other targets, you can frequently leave Shredder Acolytes standing as long as you have decent cover. But don’t ignore any Acolytes armed with Boomers, as they can easily flush you out of cover.
Knight
Powerful frontline warriors of the Hive, Knights stride into battle with thick armor and dark magic.
Loadout: Boomer
Variants: Shredder, Cleaver
Mythic Difficulty: Gain Arc shield
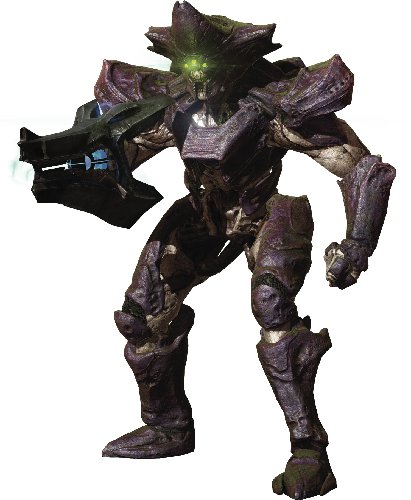
Behavior
Knights are heavily armored frontline enemies. Tougher than Acolytes, their only noticeable weakness is their plodding pace on the battlefield.
Knights are usually armed with a Boomer, a powerful explosive weapon that has a large blast radius. Boomers also make Knights very dangerous because they can flush you out of cover from long range.
They may also appear armed with either a Shredder or the Cleaver. If they do use a Shredder, be wary: while it is usually less dangerous than a Boomer, Knights are more accurate than Acolytes.
Cleaver Knights are a different matter entirely. Armed with a viciously powerful sword, these powerful melee combatants stride into close quarters and attempt to eviscerate you with a single swing.
On top of their inherent durability, Knights can summon a wall of darkness, blocking all incoming damage and restoring their health.
Knights can also go into a berserk rage when their health gets critically low. After this point, each time you damage them, they have a chance of entering a berserk stage. This causes them to regain some health and charge toward you to engage in melee combat, heedless of cover or positioning.
Luckily, the berserk state does wear off after a time. Though it is possible for a Knight to heal up between the wall of darkness and berserking and then berserk a second time later, this is usually rare. It requires an unusual engagement for a Knight to stay alive that long!
Tactics
Dispatch Boomer Knights as quickly as possible. Hit them a few times to trigger their shields, then lay into them when their shields drop.
Do not let Cleaver Knights anywhere near you. If you see them, consider them a priority target on par with Cursed Thrall, even more dangerous than Boomer Knights.
It’s well worth it to burn an offensive super move or use Heavy Weapon ammo on groups of Knights. They are simply too dangerous to leave active for lengthy periods of time during an open firefight against other Hive forces.
You can break a Hive Knight’s wall of darkness with a super move or a rocket, but you’re often better served by waiting out the wall, turning to other targets while it is active, and then finishing the Knight when the shield drops.
Berserking can make a Knight an easy target, but it can also get you into trouble if a Knight berserks at close range and charges you instantly. Once a Knight is weakened, finish it off swiftly; don’t let it linger at low health.
Berserking Cleaver Knights are a panic super-level threat—they can and will kill you and your teammates incredibly quickly. Don’t let them get into range!
On Mythic difficulty, Knights gain yet more durability with Arc Shields. Be absolutely sure to bring a ready source of Arc damage if you anticipate many encounters with Knights during a mission. Knights are already sturdy and dangerous enemies, and the Arc Shield gives them more time to hammer you with long-range bombardment or get into range with their vicious Cleavers.
Wizard
Floating above the battlefield, Wizards support Hive forces with what can only be described as dark magic.
Loadout: Darkness Blast, Clouds of Darkness, Solar shield
Variants: None
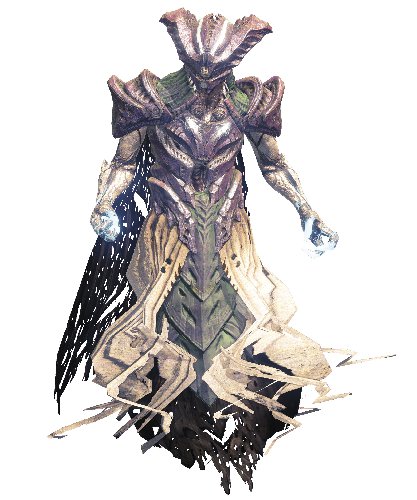
Behavior
Wizards hover above their Hive minions and bombard Guardians with bolts of raw darkness. These well aimed projectiles are difficult to avoid in the open, but they are slow moving and fairly easy to dodge if you keep them in sight.
In addition to their ranged attack, Wizards can also summon a dark sphere of foul energy. Hive that stand within it are healed, whereas it damages any Guardians caught inside. If you are standing inside when the sphere appears, get out quickly: it damages and dulls your perception.
Wizards come armored with a Solar shield. Although you can take them down fairly quickly once you destroy the shield, they are nimble targets in the air. This makes them poor targets for grenades or rockets.
On higher difficulty tiers, Wizards’ basic Darkness Blast attack becomes noticeably faster and more deadly, increasing their lethality.
Tactics
Wizards are dangerous opponents, and although they rank slightly below Boomer or Cleaver Knights in terms of immediate threat, you should dispatch them as swiftly as possible.
Wizards hovering around the battle while you are fighting, healing Hive and pelting you with seeking bolts increase the difficulty of any encounter.
To take them down quickly, heavy machinegun fire or sniper shots work quite well. A blast from a fusion rifle can hit them from a decent distance, as well.
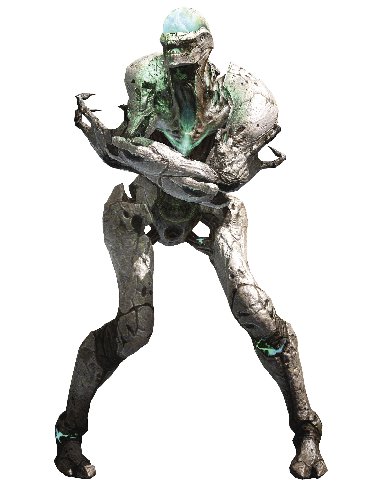
Ogre
Mutated masses of muscle and fury, Ogres are living Hive battering rams.
Loadout: Eye Blast, Ground Slam
Variants: None

Behavior
Ogres are as brutally direct as the Thrall, with two major differences: they are far stronger and tougher, and they have a very dangerous projectile weapon in the form of their Eye Blast.
When an Ogre spots a Guardian at a distance, it unleashes a continuous beam of dark Void energy from its eye. This attack is very dangerous and damaging, so avoid getting caught inside the beam for any length of time.
Additionally, the Ogre prefers to rush into melee range, where it can unleash a devastating ground smash that causes damage in a wide area around itself.
Like Knights, Ogres can enter a berserk state when they get low on health. But unlike Knights, Ogres always berserk when they get low! Don’t leave heavily damaged Ogres roaming the battlefield; take them down quickly.
Tactics
The Ogre is another high-threat Hive target that you must dispatch immediately, or else you risk it taking you down alone.
Super attacks and Heavy Weapon ammo are well worth expending when you spot an Ogre. Thankfully, they are among the rarest of Hive forces, but respect the threat they represent in battle when they do appear.
It is possible to evade an Ogre at close range by jumping, but unlike the Thrall or Cleaver Knights, the Ogre has a dangerous ranged attack that it can follow up with. That said, if given the choice between definitely eating a ground pound and possibly getting hit by an eye beam, jump!
Shrieker
Void-infused sentinels, Shriekers serve as immobile but animate sentries of the Hive’s dark holds.
Loadout: Void Blast
Variants: None

Behavior
Shriekers are rarely encountered Hive “turrets” of a sort. They are immobile and instantly attack any Guardian in range with bolts of Void energy.
Shriekers can phase into existence during a battle. Be particularly alert for their presence during major Strike battles, as they are often located in what would otherwise be nicely defensible terrain.
Tactics
You can easily dispatch Shriekers safely from a distance, because they are immobile targets. The primary danger comes from a Shrieker you don’t spot, or one phasing in near you while you already engaged in battle.
When you do spot a Shrieker, seek out nearby cover and take it down from range. A Shrieker releases a blast of Void energy when it dies, so you don’t want to be near them when they are destroyed.
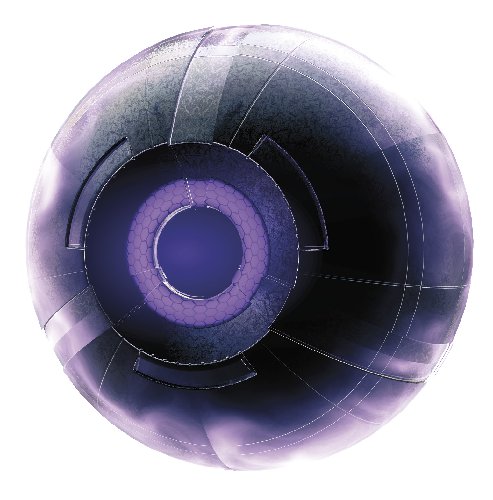
Tomb Ship
A strange and otherworldly transport “ship,” the Tomb Ship rips holes in reality and deposits its foul cargo on the battlefield in a cloud of darkness.
Loadout: Void Turrets
Variants: None
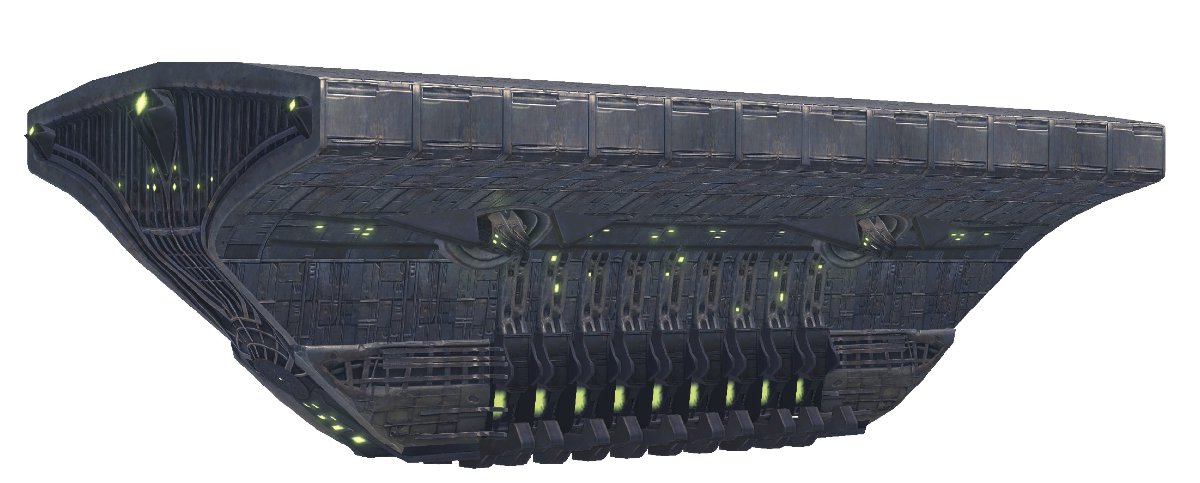
Behavior
Tomb Ships phase in and out of existence, warping onto the battlefield, dropping Hive forces, and then vanishing.
Don’t be surprised to see a Tomb Ship “flying” beneath the surface of the Moon! These transports can appear anywhere there is enough space, allowing the Hive to drop reinforcements almost anywhere you encounter them.
Much like Wizards, Tomb Ships are armed with Void energy turrets that fire tracking projectiles. Consequently, it is best to seek cover when they arrive, since they are difficult to evade in the open.
Tactics
When a Tomb Ship prepares to unleash its Hive forces onto the battlefield, clouds of darkness form beneath it before the Hive troops appear.
If you are quick enough, you can get a lingering area-of-effect grenade onto the ground that detonates just as the Hive appear, inflicting significant damage before they have a chance to disperse.
Similarly, a well-aimed rocket can annihilate an entire Tomb Ship’s payload if you time the shot correctly.
You can also shoot off the turrets on a Tomb Ship. If one is hovering too long for your liking, destroy the nearest turrets, and then return your attention to the Hive forces in the area.
[/toggle]
[toggle title=”Hive Enemy Trailer” state=”close” ][yframe url=’http://www.youtube.com/watch?v=Qd1IoYkzfyI’][/toggle]